How to use the Krikey Video Editor
Learn how to use the Krikey video editor and explore every button in our online video editor app. Start animating your first video with 3D characters today using Krikey AI Animation Maker.

In this guide we will learn how to use the Krikey AI Animation Video Editor. From prompt to project, you can follow this guide to learn how to animate your first video. Let's start with our Quick Guide below.
Quick Guide on how to use the Krikey AI Animation Maker Video Editor
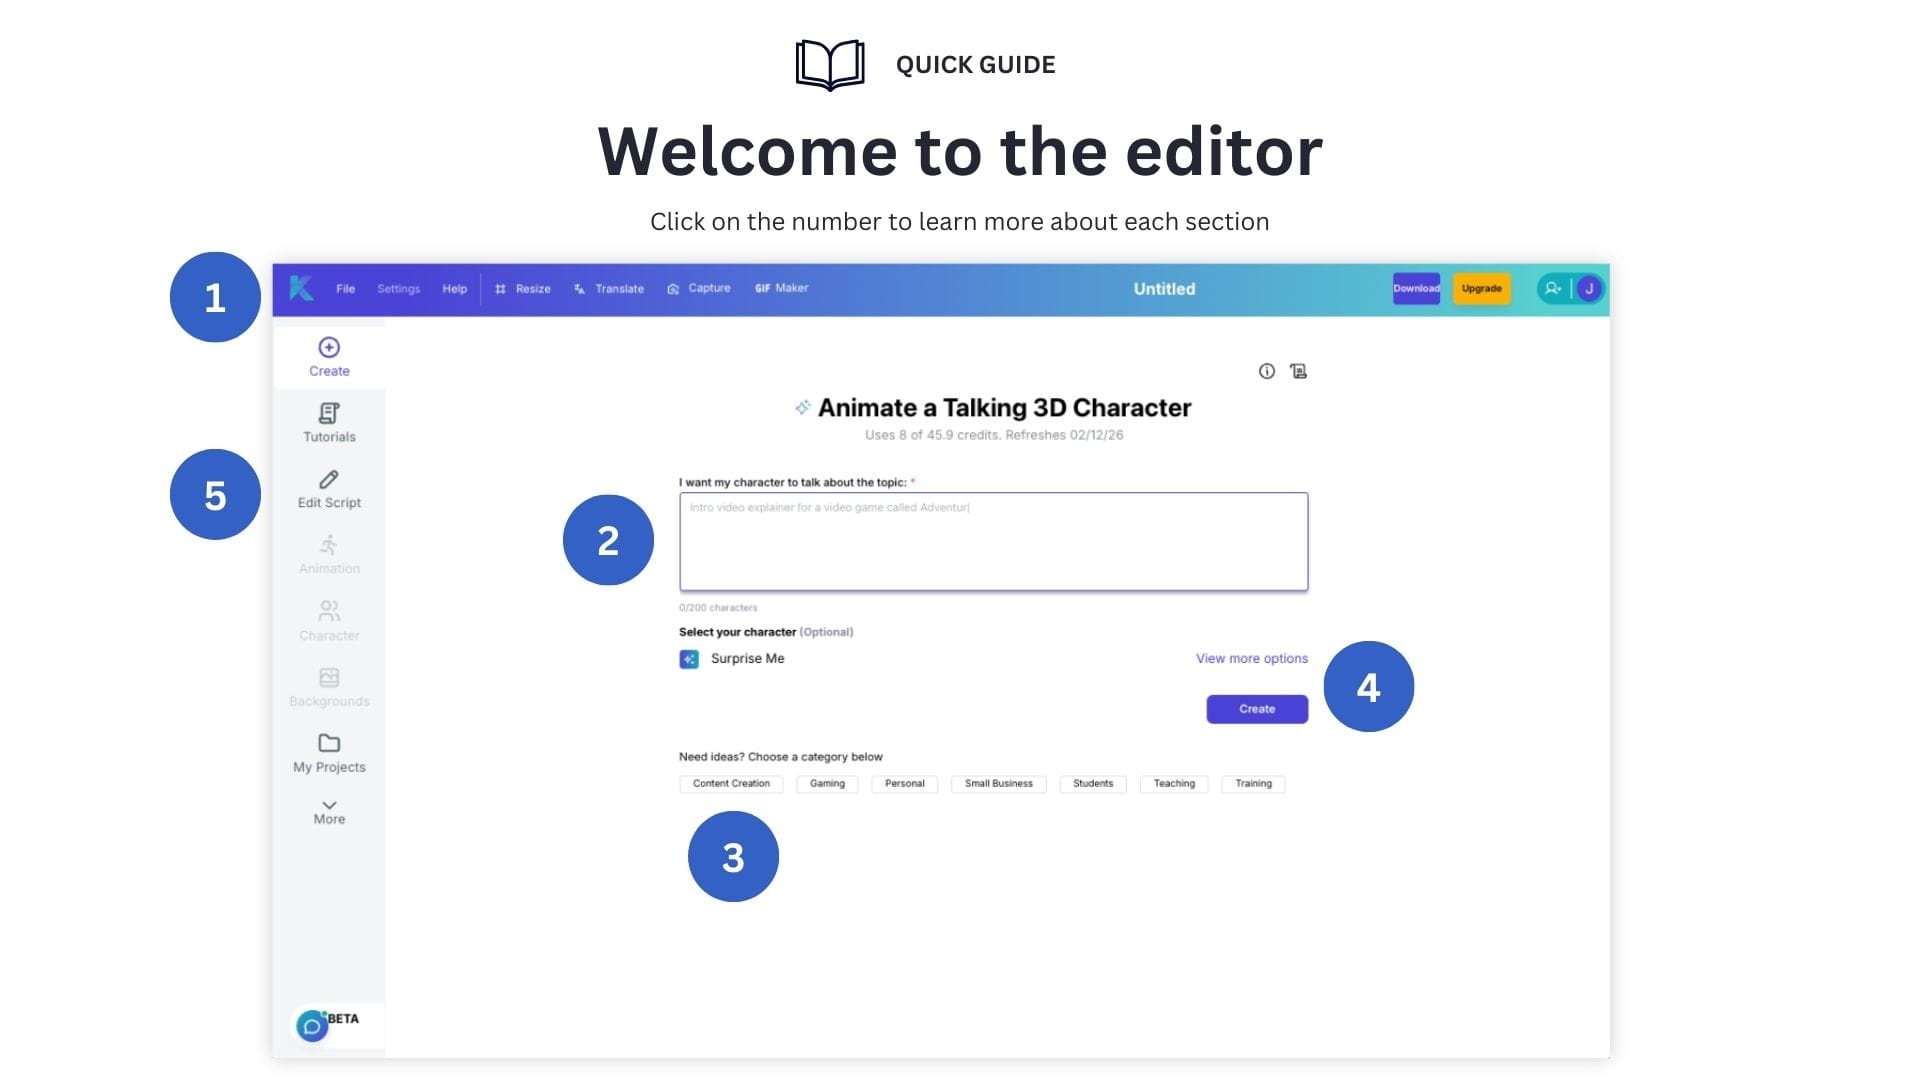
- 1) Header: This top row of icons has key actions to modify your project.
- 2) Text Prompt Box: This is where you enter your text prompt to make a video.
- 3) Suggested Prompts: If you need help, these are sample text prompts to use.
- 4) Create: Click this button to generate your animation video.
- 5) Toolbar: This has all the video editing tools you need to animate.
Exploring the Krikey Online Video Editor App Header Bar
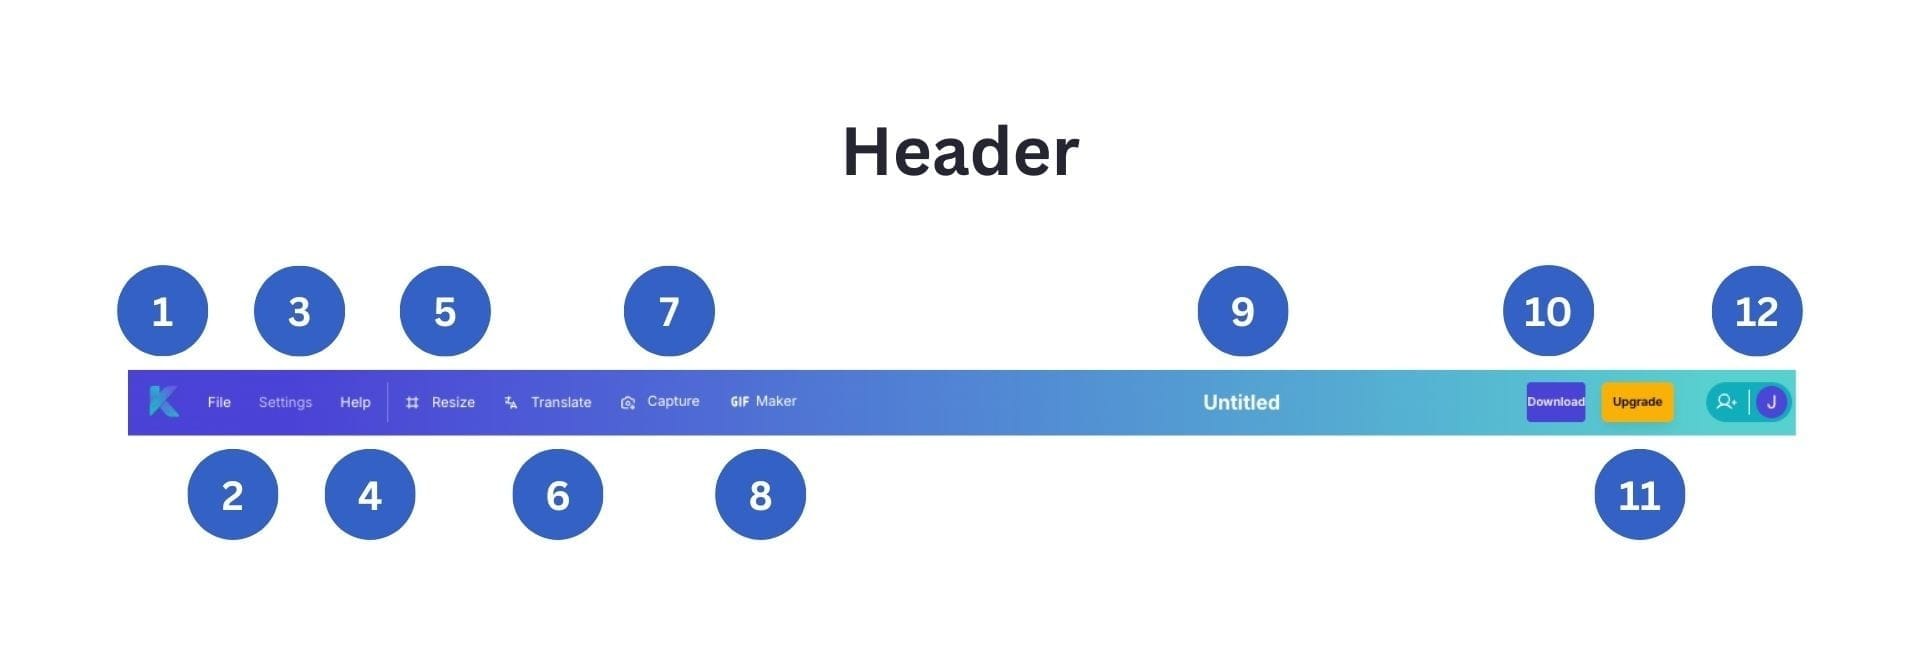
- 1) Krikey 'K' logo: This takes you back to your project dashboard.
- 2) File: This dropdown has settings to manage projects.
- 3) Settings: This dropdown has advanced technical options.
- 4) Help: This dropdown links to our detailed help center.
- 5) Resize: Change your video size for social media export.
- 6) Translate: Convert your video to any language instantly.
- 7) Capture: Export high resolution character pose images.
- 8) GIF Maker: Export custom GIFs in seconds.
- 9) Project Title: Edit to easily find your project later.
- 10) Download: Export MP4 video, image, GIF, FBX files.
- 11) Upgrade: Upgrade to Pro or Teams subscription plans.
- 12) Account: See total credits remaining and account options.
Learning about the Krikey Online Video Editor Toolbar
- 1) Create: Click this to start a new project.
- 2) Tutorials: Video guides on how to use Krikey AI Animation.
- 3) Edit Script: Edit script dialogue and voice AI styles in your video.
- 4) Animation: Grey till you create your first video. Then browse our animation library or make your own animations.
- 5) Character: Grey till you create your first video. Switch between characters in just a click and customize your own characters.
- 6) Backgrounds: Grey till you create your first video. Swap video backgrounds in seconds, upload your own or AI generate backgrounds.
- 7) My Projects: See all your past projects and open any of them in the video editor.
- 8) Present: Add a presentation screen of slides or videos behind your character. Great for pitch videos, lesson plans or presentations.
- 9) Audio: Record or upload your own audio tracks for character voices.
- 10) Face: Edit character facial expressions with this menu.
- 11) Hands: Edit character hand gestures with this menu.
- 12) Effects: Add visual effects like confetti, mouse clicks and smoke transitions with this menu.
- 13) Filters: Add video filters like black and white or sepia with this menu.
- 14) Music: Make your own AI music video in seconds.
- 15) Beta: This opens the AI chat agent editor to help edit your video.
How Smart mode works with an AI Chat Agent in the Krikey Video Editor
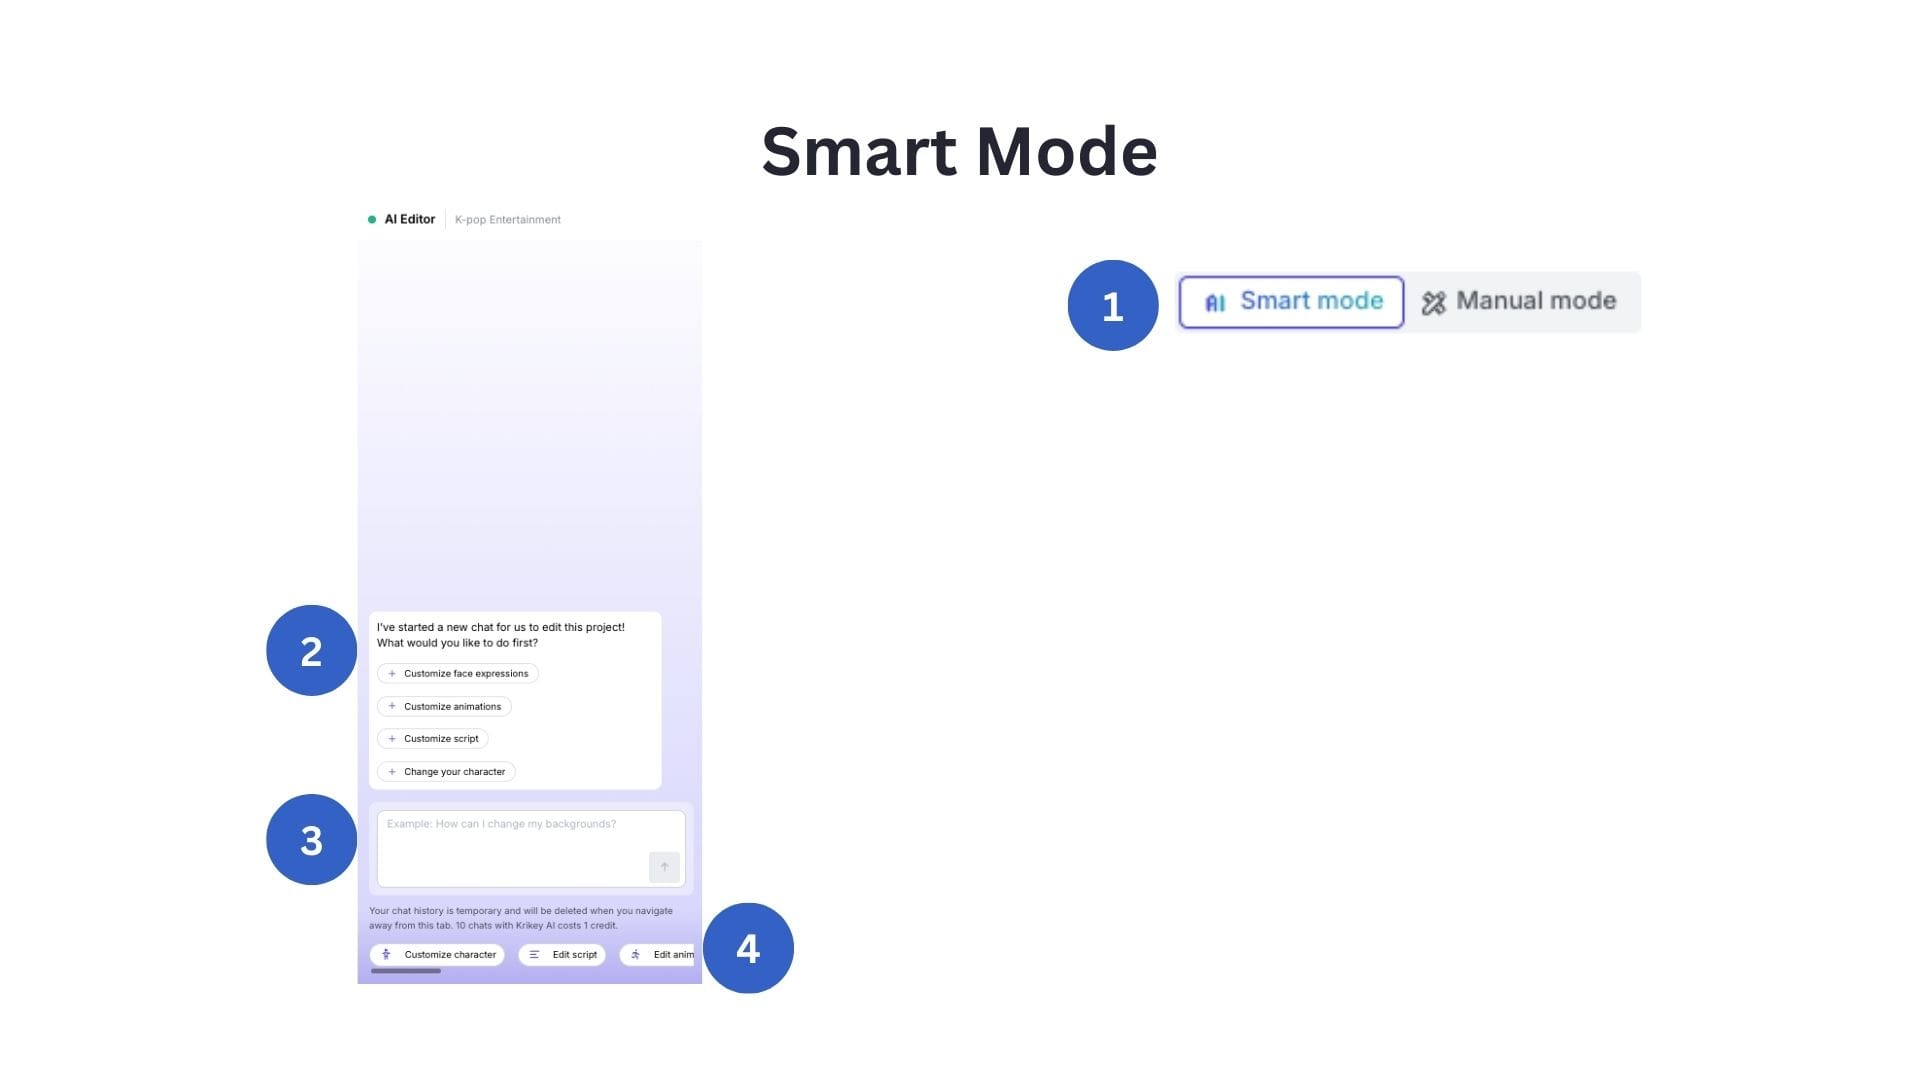
- 1) Smart Mode: On the top right of your video there is a toggle button, here you can select 'Smart Mode' to open the AI Chat Agent Editor.
- 2) AI Chat Agent Editor: This is what the AI Chat Agent Editor looks like. It will give you a menu of options to start editing.
- 3) Chat Box: You can also type into the chat box if you want to edit something specific, for example: "Backgrounds" or "Character".
- 4) Quick Actions: You can scroll the quick actions menu below the chat box to quickly find what you want to edit, for example: "Edit Script" or "Edit Animations".
How Manual mode works in the Krikey Animation Software
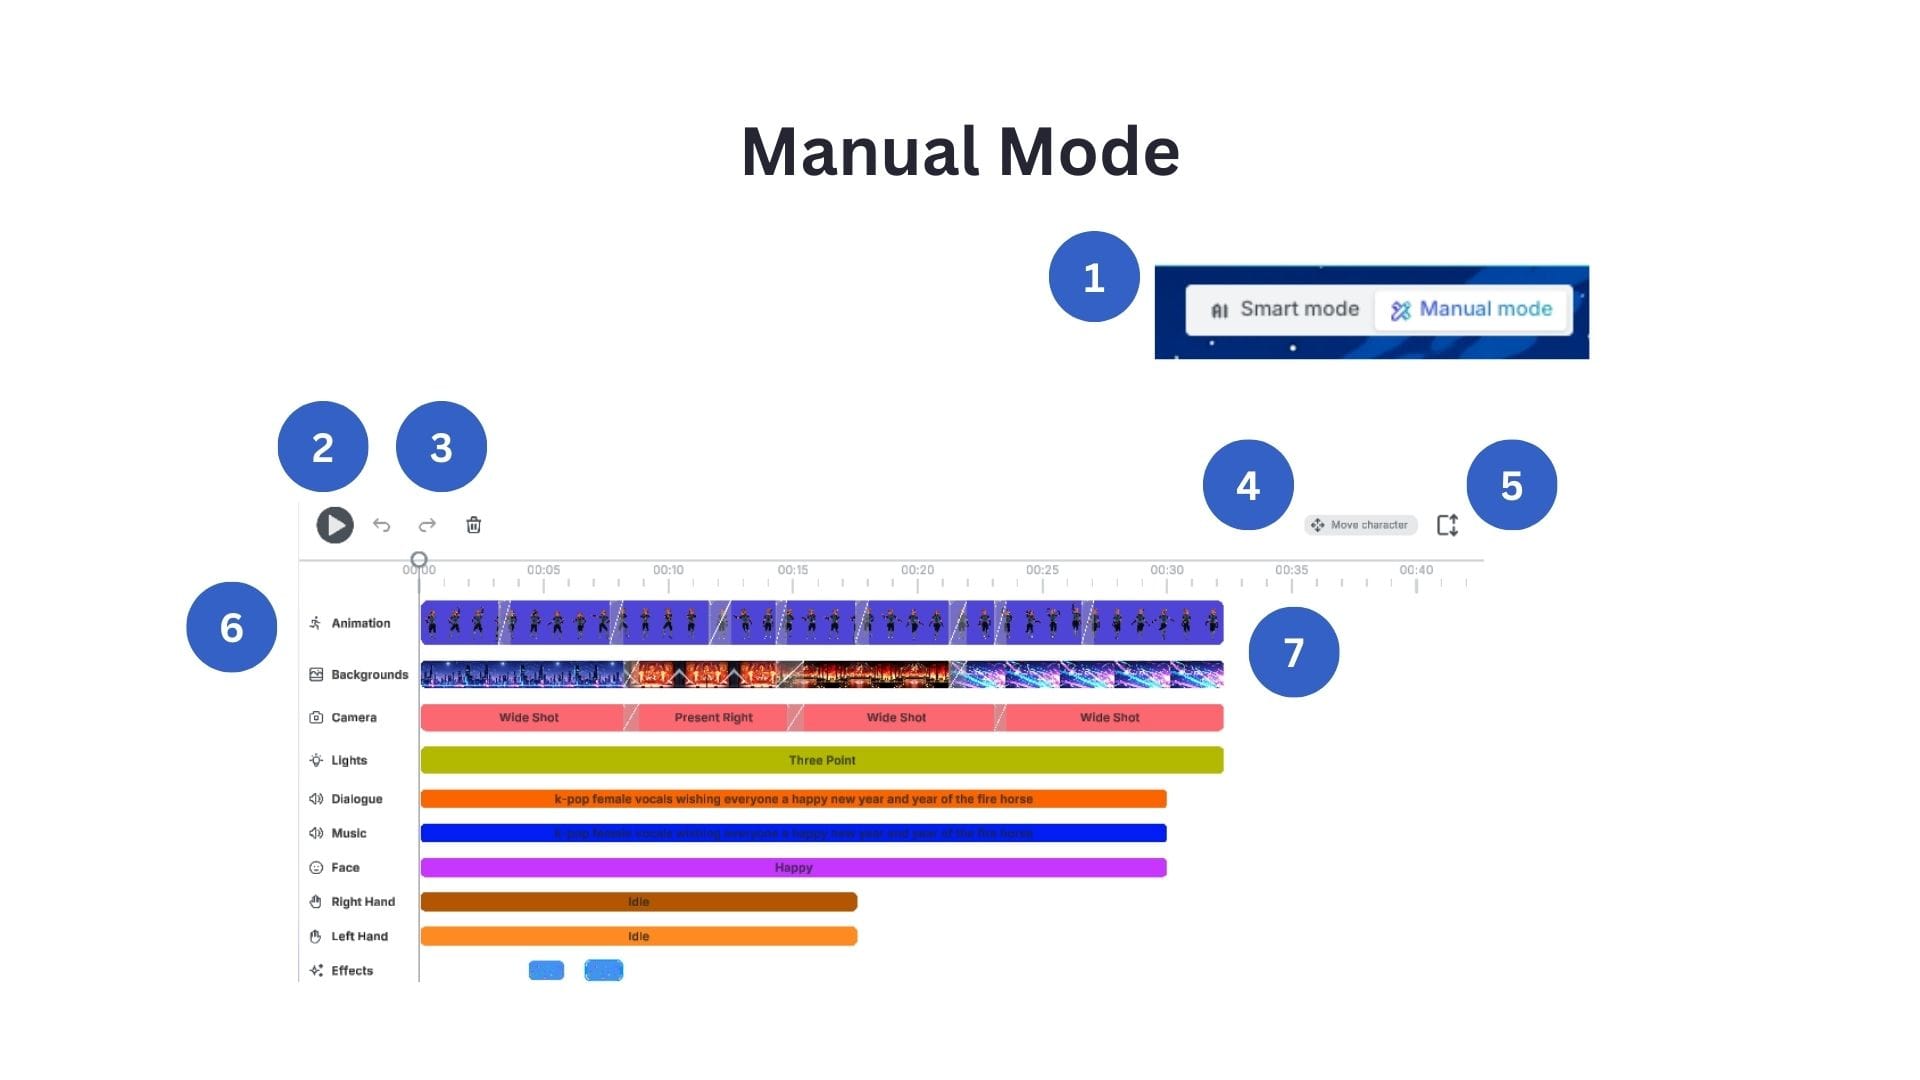
- 1) Manual Mode: On the top right of your video there is a toggle button, here you can select 'Manual Mode' to open the Timeline Editor.
- 2) Play Button: Click this button to play back your video.
- 3) Undo, Redo, Trash: Use these buttons to undo or redo an action. To delete a clip, you must select it on the timeline below and then click the Trash icon.
- 4) Move Character: Click this to open a slider bar menu to move your character within the video.
- 5) Expand timeline: Click this to expand your timeline view to see all the tracks (as pictured in the image above - this is expanded view).
- 6) Timeline Editor: This shows all the tracks in the timeline editor. There is a row for each separate element of your video: Animation has every character motion, Background has each background in order of appearance, Camera has every camera angle, Lighting, Dialogue, Music, Face expressions, Right hand gestures, Left hand gestures and Visual effects. You can click on any individual clip in the timeline editor to open a more detailed customization menu for that item, or to replace it (for example, with a different animation or face expression).
Get started making your first animation video today in the Krikey AI Video Editor. Click the button below to enter the video editor and start your free trial.
And if you read this far, thank you for choosing Krikey AI Animation! Here's a discount on us (while supplies last), you can use the code EDU25 at checkout when you purchase your subscription. Have fun animating!